Build a cross platform desktop app with electron and react typescript, tailwind css
Hello everyone, I just released the first version of Offline Dev Tools - A small desktop application built with electron, react typescript, tailwindcss, shadcn/ui, and some other tools.
It provides some useful offline tools such as data generation, data transformation, base64 encoding/decoding, time zone comparison, ...
The software is inspired by DevToys and other libraries like https://transform.tools/, faker-js. I designed and built it myself in a few weeks. There are still many features I want to improve and add to the software in the future.
Regarding the application I built, you can view it or download and use it on Linux, Windows, or macOS.
https://github.com/phamquyetthang/offline-dev-tools
Electron-forge vs electron-vite
When starting to build and explore electron, I initialized the project with electron-vite because I was familiar with vite and react recently, And it really did a great job when I didn't spend much time to start the project, integrate tailwindcss and shadcn/ui into the project. Everything you need is here: https://electron-vite.org/guide/
I have completed about 30% of the features in my software using electron-vite, until I encountered some issues when packaging (building for production) or installing additional packages. The electron-vite community and documentation are not large enough for me to find help with the issues I encountered.
After evaluating multiple times, I decided to switch to electron-forge and have been working conveniently with it until now.
Installing react typescript and tailwindcss into the electron-forge project is not difficult but will take quite a while if you do not have experience (not as easy as electron-vite), In this article I will help you save a little time and get started an electron-forge project that works seamlessly with react typescript and tailwindcss.
Create new app with Electron Forge
npm init electron-app@latest my-new-app -- --template=webpack-typescript
my-new-app: Please change this to your project name
--template=webpack-typescript: indicates you will use webpack, and typescript instead of javascript
electron-forge supports you to initialize with vite but it seems it is not ready to combine with react so please just work with webpack for now
After running the above command, a project will be created and you can run it with the npm start command
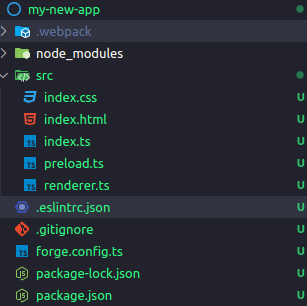
Looking through the files, you will see the content in the src/index.html file being displayed on the interface.
And the src/renderer.ts file will be where we write our typescipt code.

Install React to the project:
npm install --save react react-dom
npm install --save-dev @types/react @types/react-dom

# or with yarn
yarn add react react-dom
yarn add -D @types/react @types/react-dom
Now you can create an app.tsx file in src to be the root file for your react part
// # src/app.tsx

import './index.css'; // import css

import * as React from "react";
import { createRoot } from "react-dom/client";

const root = createRoot(document.getElementById('root') as HTMLElement);
root.render(
  <React.StrictMode>
   <h1>Hello react</h1>
  </React.StrictMode>
);
Import to src/renderer.ts:
// # src/renderer.ts
import './index.css'
import './app' // <== add this line
Modify the src/index.html file so that it works with the document.getElementById('root') line in the app.tsx file:
<!-- # src/index.html -->
<!doctype html>
<html>
  <head>
    <meta charset="UTF-8" />
    <title>My app name</title>
  </head>

  <body>
    <div id="root"></div>
    <!-- <== add this, root element -->
  </body>
</html>
You may get the error Cannot use JSX unless the '--jsx' flag is provided.ts, please add this line to the tsconfig.json file.
{
  "compilerOptions": {
    "jsx": "react-jsx" // <== add this line
    // other existed configs
  }
}
Rerun the project and you will see the code you just changed displayed
From this point, you can organize the project structure of a react application and import it into src/app.tsx
Install tailwindscss
First, install tailwind css dependentces
npm install tailwindcss autoprefixer --save-dev

# or with yarn
yarn add -D tailwindcss autoprefixer
Init file config
npx tailwindcss init
A tailwind.config.js file will be created in the project's root directory
Open that file and modify this section so tailwind understands where its classnames will be used:
/** @type {import('tailwindcss').Config} */
module.exports = {
  content: [
    './src/**/*.{ts,tsx,html}' // <== Update this
  ],
  theme: {
    extend: {}
  },
  plugins: []
}
For webpack and electron to work with tailwind, we also need to install postcss, postcss-loader
npm install postcss postcss-loader

# or with yarn
yarn add postcss postcss-loader
Then create the file postcss.config.js with the following content:
//postcss.config.js

import tailwindcss from 'tailwindcss'
import autoprefixer from 'autoprefixer'
export default {
  plugins: [tailwindcss('./tailwind.config.js'), autoprefixer]
}
Add postcss-loader to webpack.renderer.config.ts
// webpack.renderer.config.ts

rules.push({
  test: /\.css$/,
  use: [
    { loader: 'style-loader' },
    { loader: 'css-loader' },
    { loader: 'postcss-loader' } // <== add this
  ]
})
Add the Tailwind directives to your CSS, src/index.css
@tailwind base;
@tailwind components;
@tailwind utilities;
Now let's test it by adding a few classnames to the h1 tag
const root = createRoot(document.getElementById('root') as HTMLElement);
root.render(
  <React.StrictMode>
    <h1 className="font-bold text-2xl underline text-red-700">Hello react</h1>
  </React.StrictMode>
);
You will see the UI has been applied on the interface.
Completed tailwind css integration, you can use components of shadcn/ui if you want.
See my project to see how I work with shadcn/ui , tailwindcss in the electron project.
Above I have guided you to create an electron typescript project, integrating react, and tailwind css.
Please ask questions if there is any part that is difficult to understand!
Finally, thank you for taking the time to read the article, please support the original article at: https://www.codeduthu.com/en/blog/electron-react-typescript-tailwind-css


